
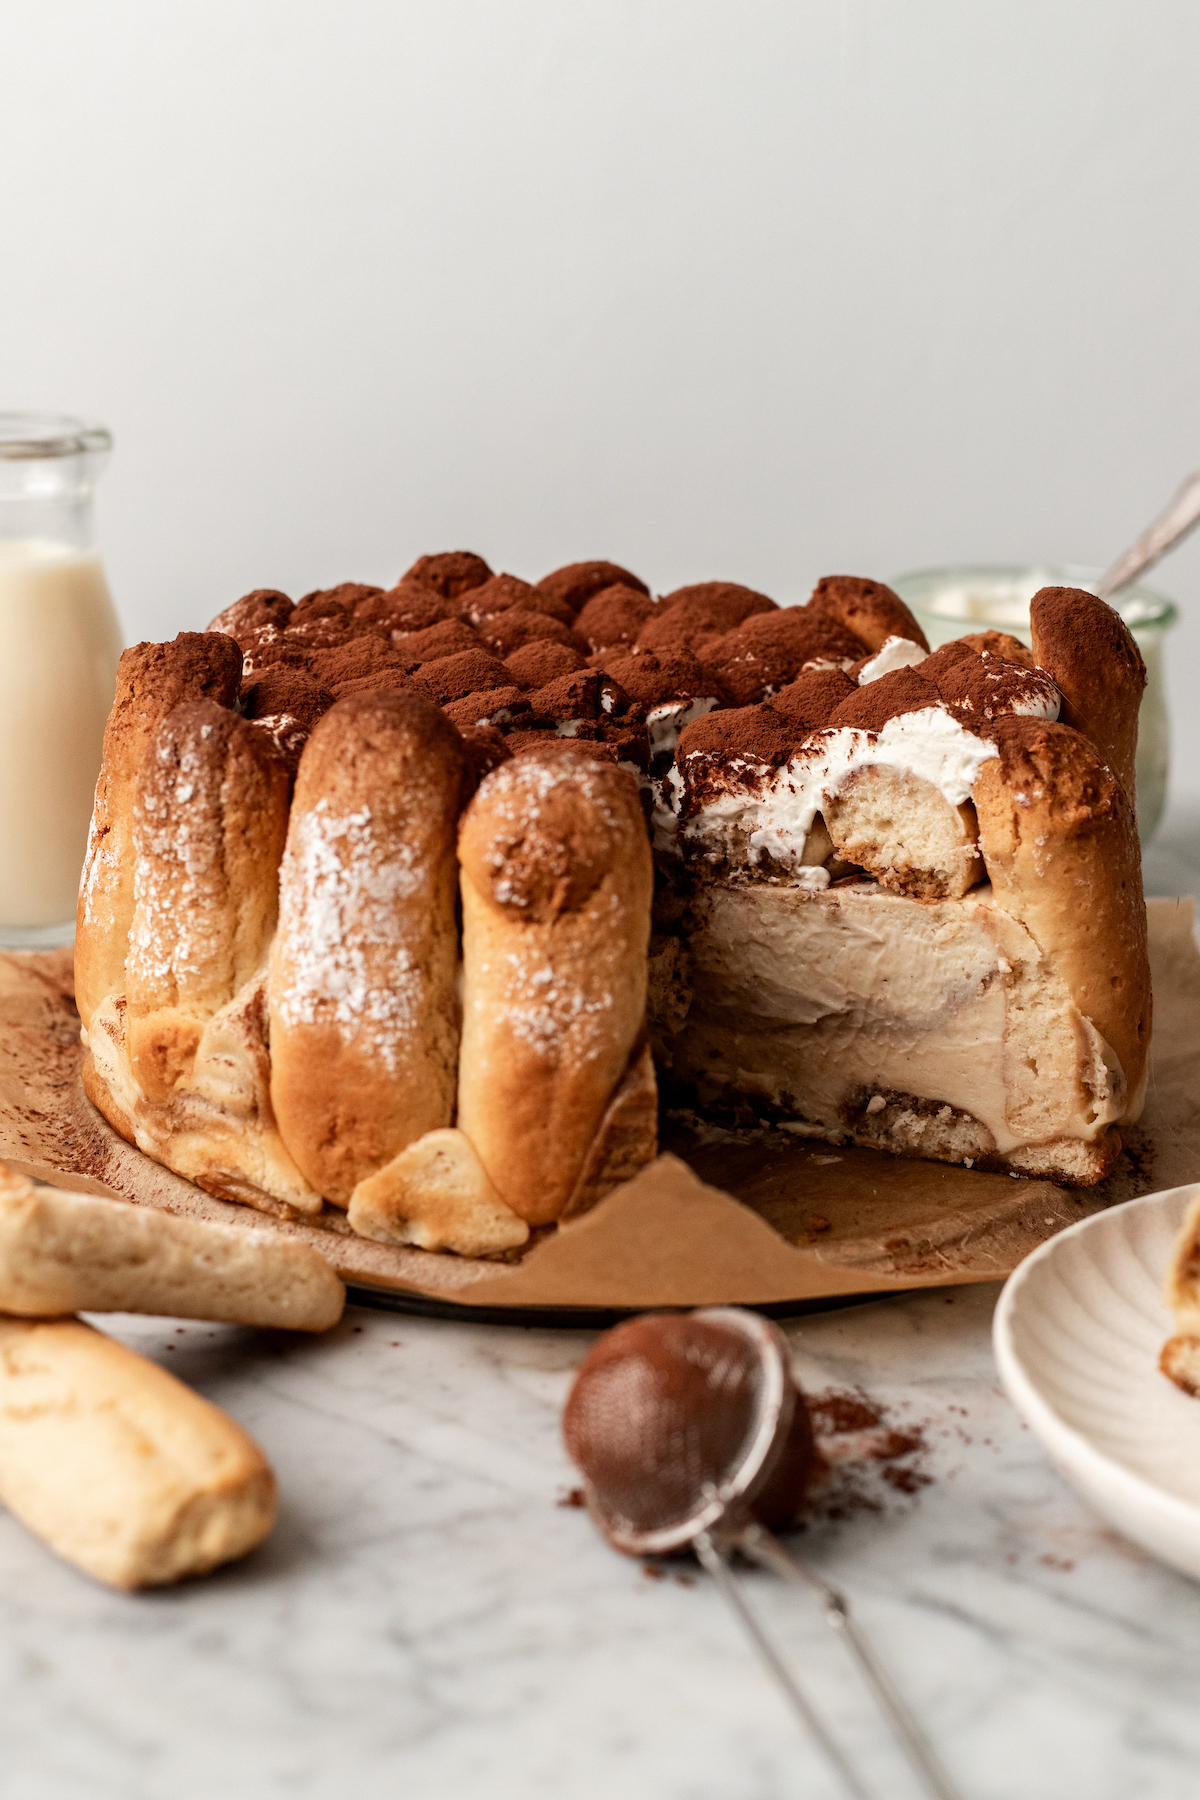
Vegan Tiramisu Cheesecake
Made with Let’s Do Organic Heavy Coconut Cream and Let’s Do Organic Cornstarch by @the_bananadiaries

This ultra silky and rich tiramisu cheesecake combines the best of tiramisu and cheesecake– and all dairy free and made without eggs! 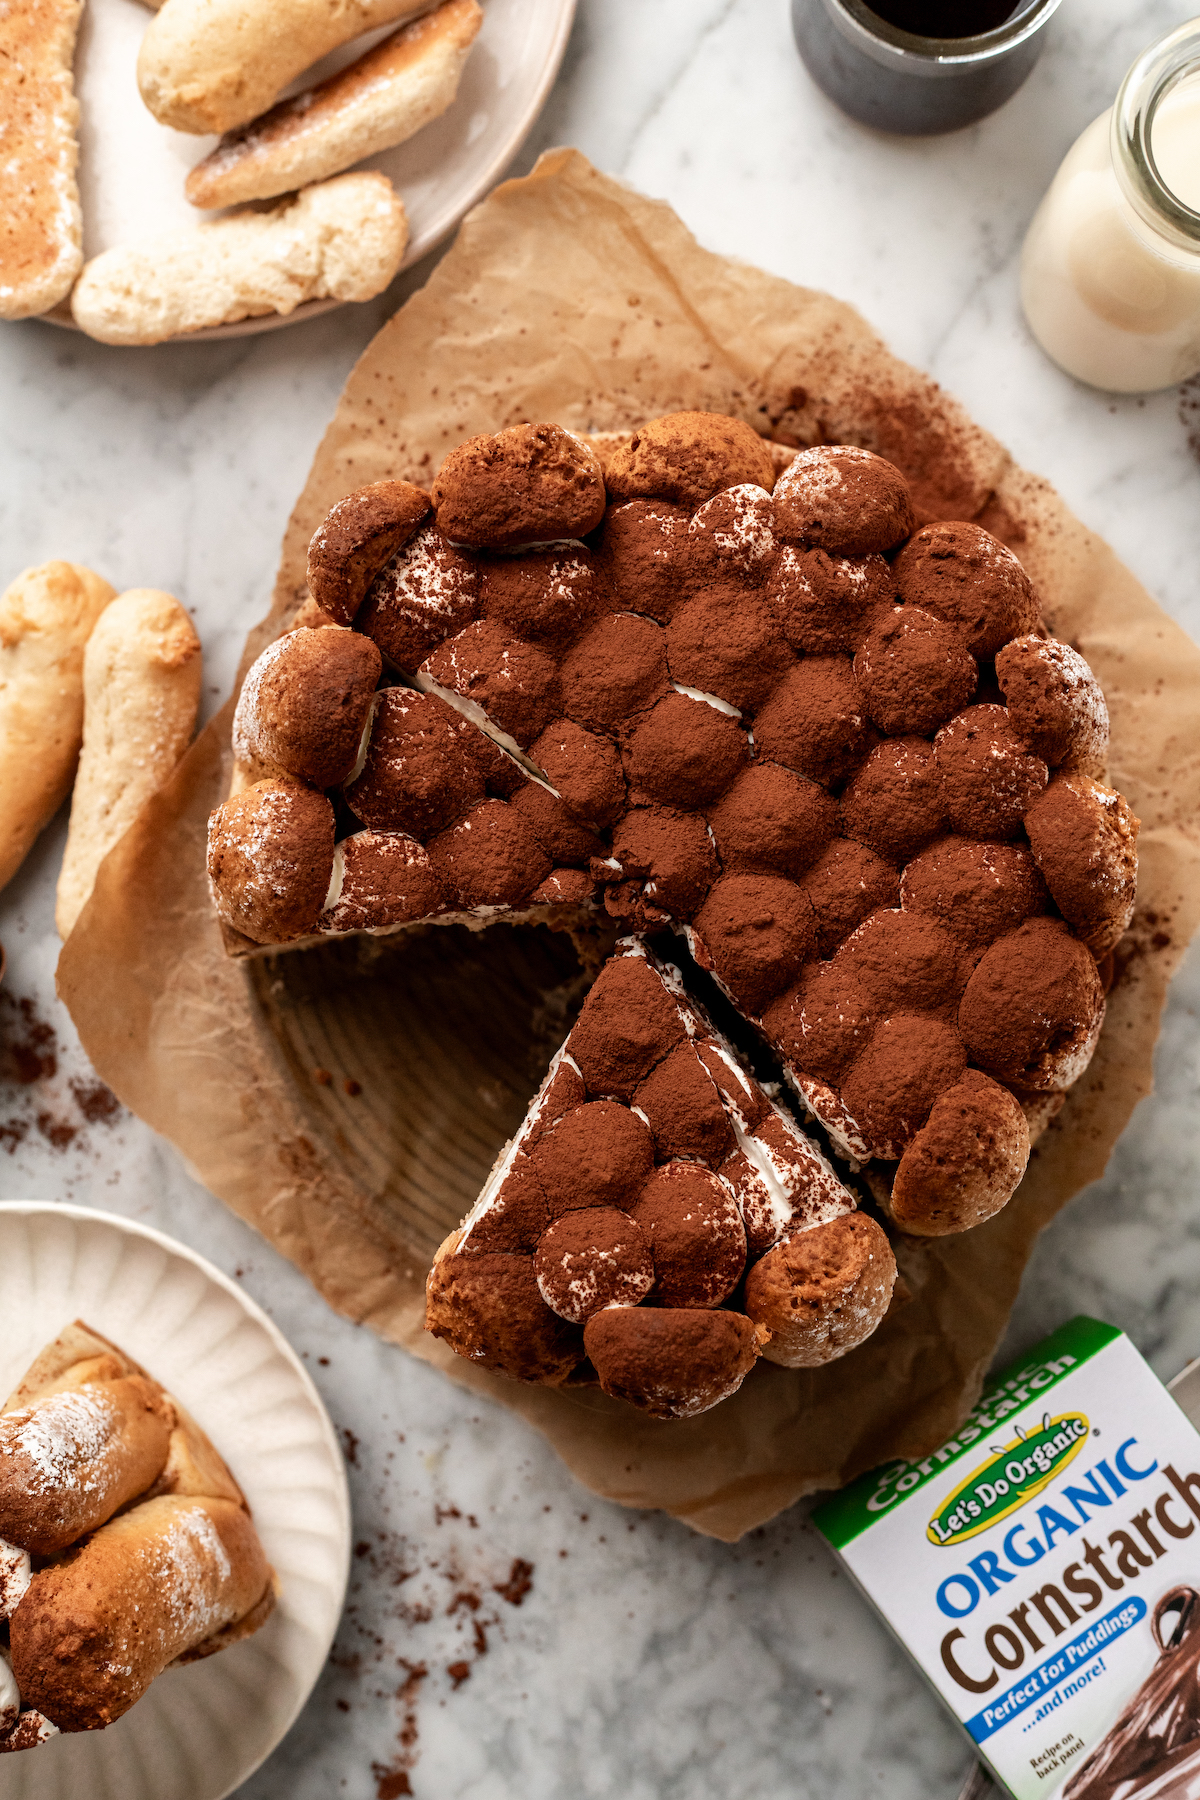
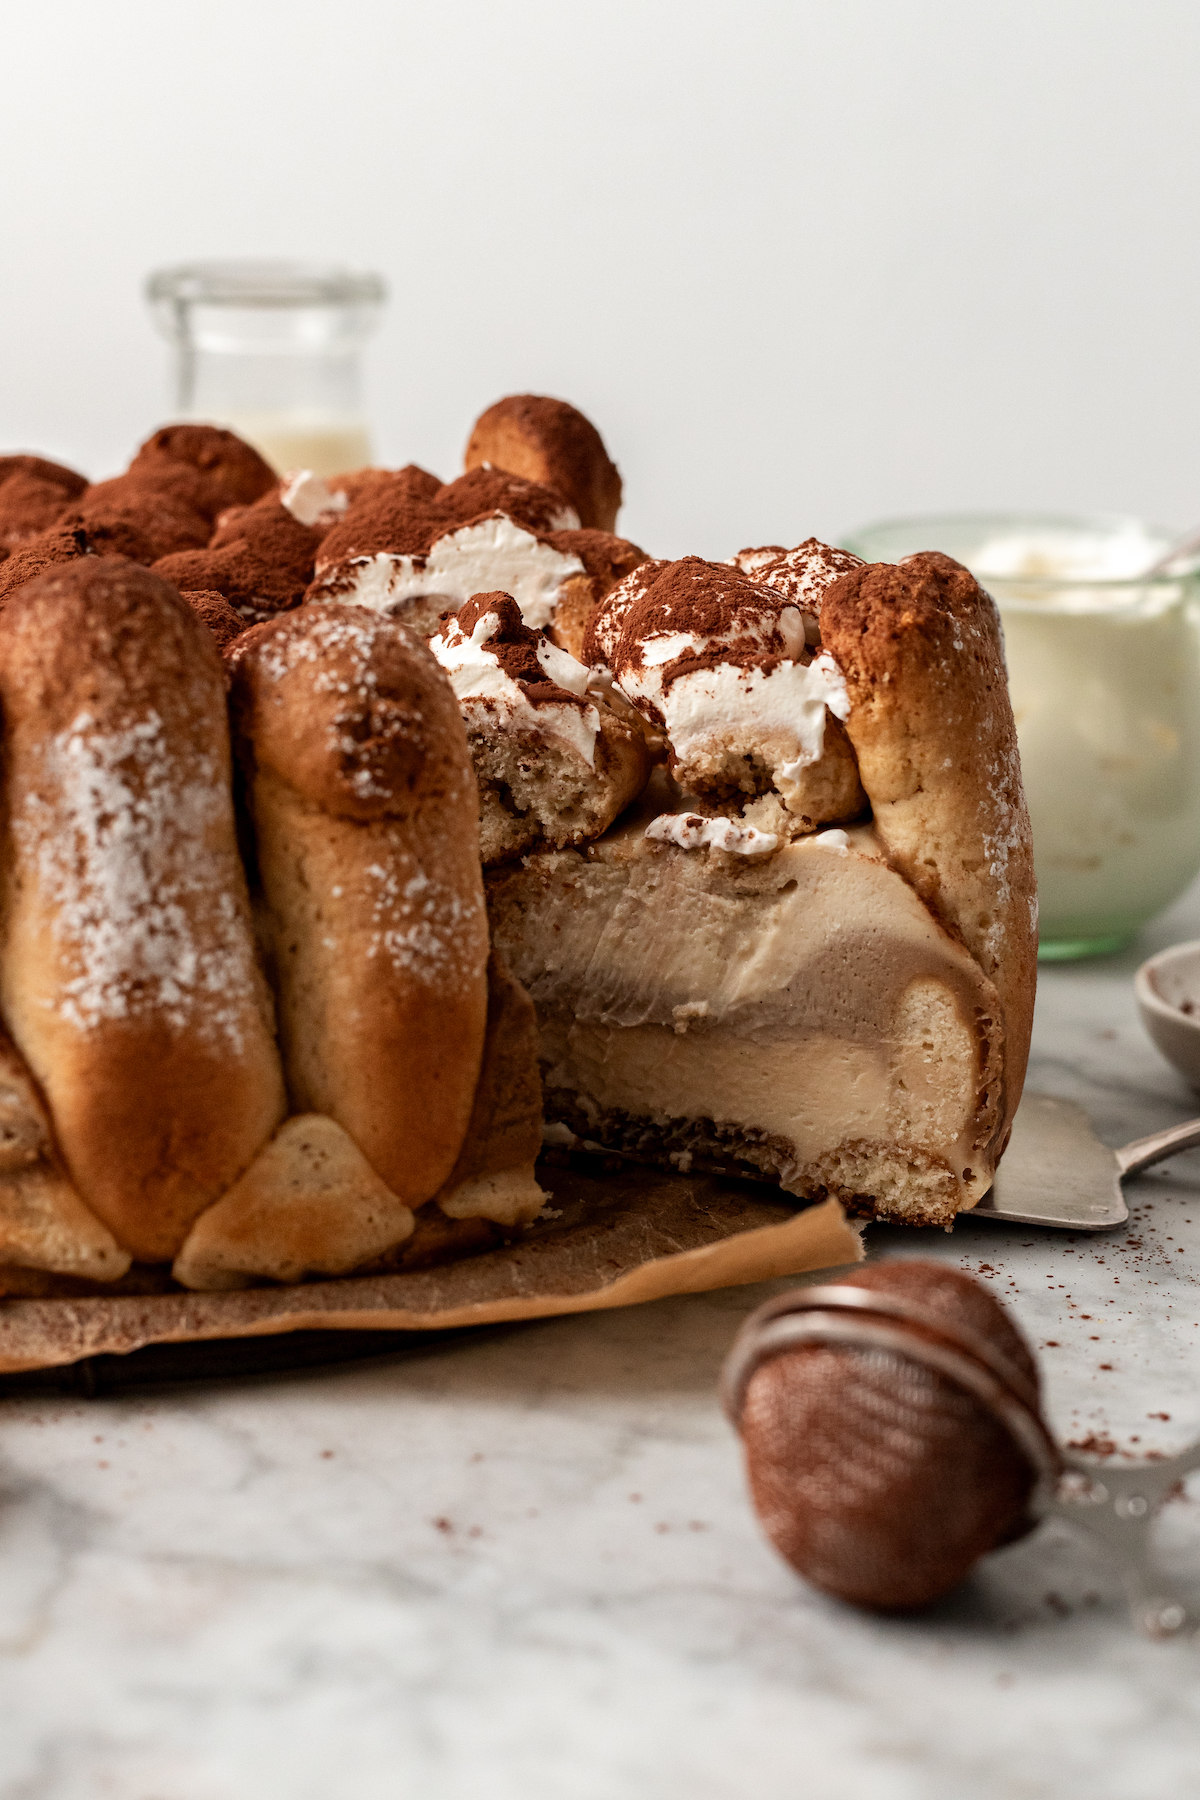
Imagine layer of homemade ladyfingers soaked in espresso with an espresso swirled mascarpone cheesecake batter that’s topped with creamy dairy free whipped cream and a hefty dusting of cocoa powder. 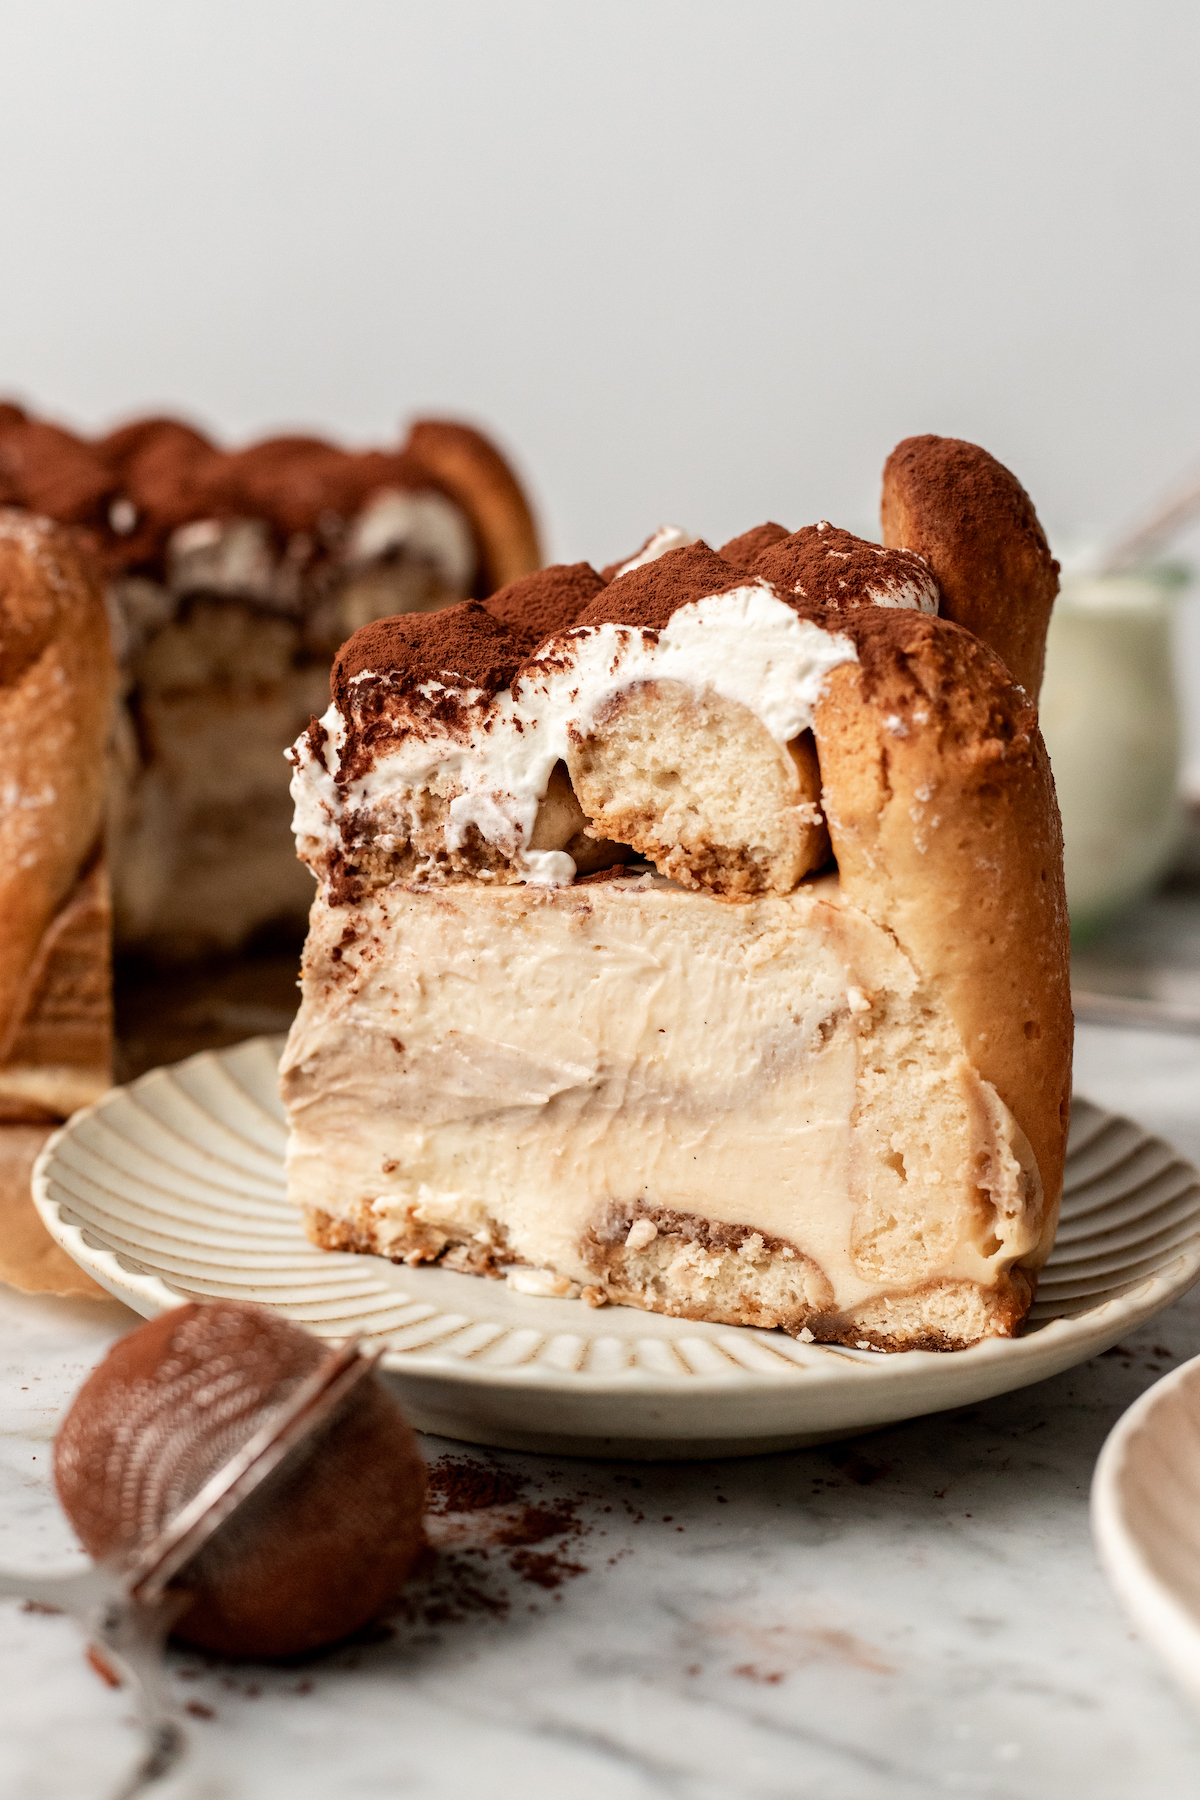
It’s the perfect pick-me-up dessert to show off at any celebration!
This cheesecake uses Let’s Do Organic Heavy Coconut Cream to make a vegan whipped cream with powdered sugar, and a touch of vanilla make this the most perfect whipped cream- dairy free or not!
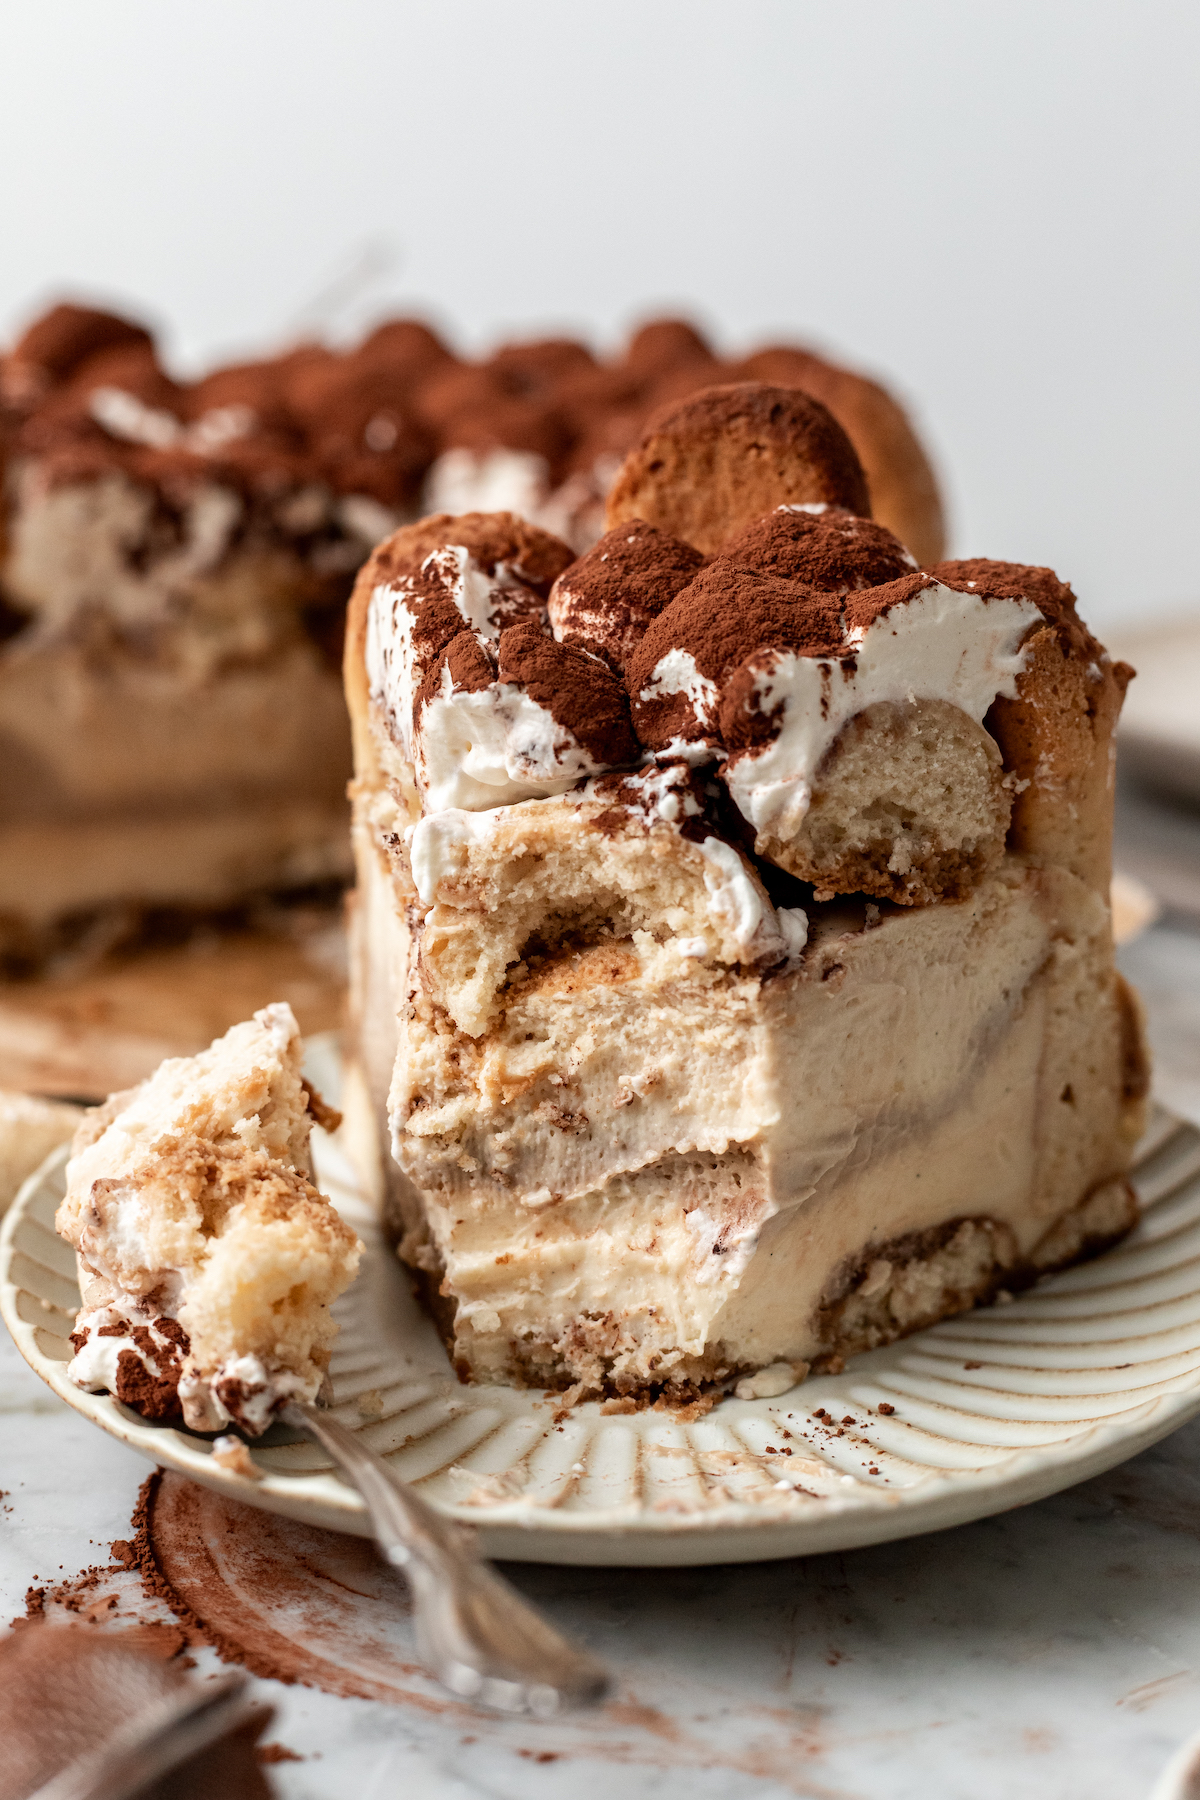
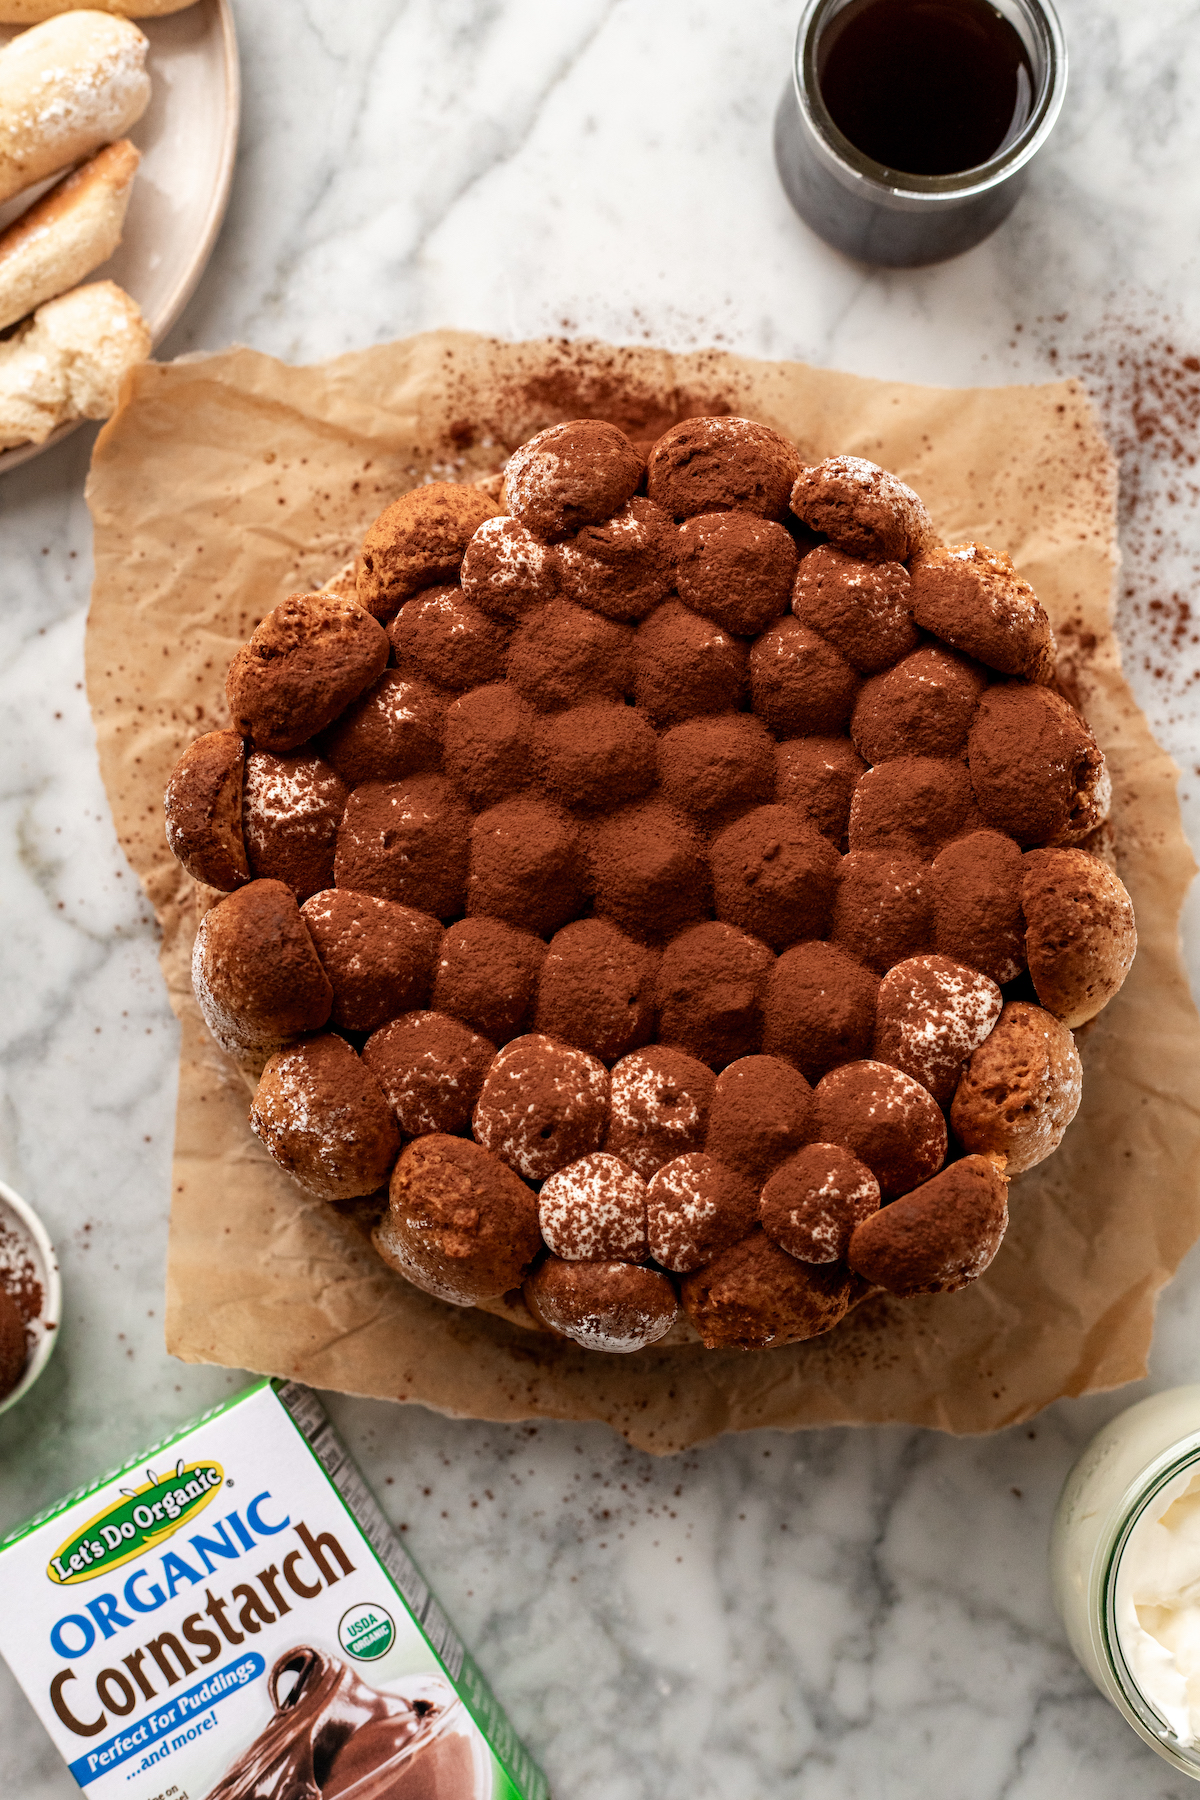
We’re going above and beyond with these easy homemade vegan ladyfingers soaked in espresso and lining the walls of our cheesecake- it ends up being the prettiest cheesecake to ever exist!
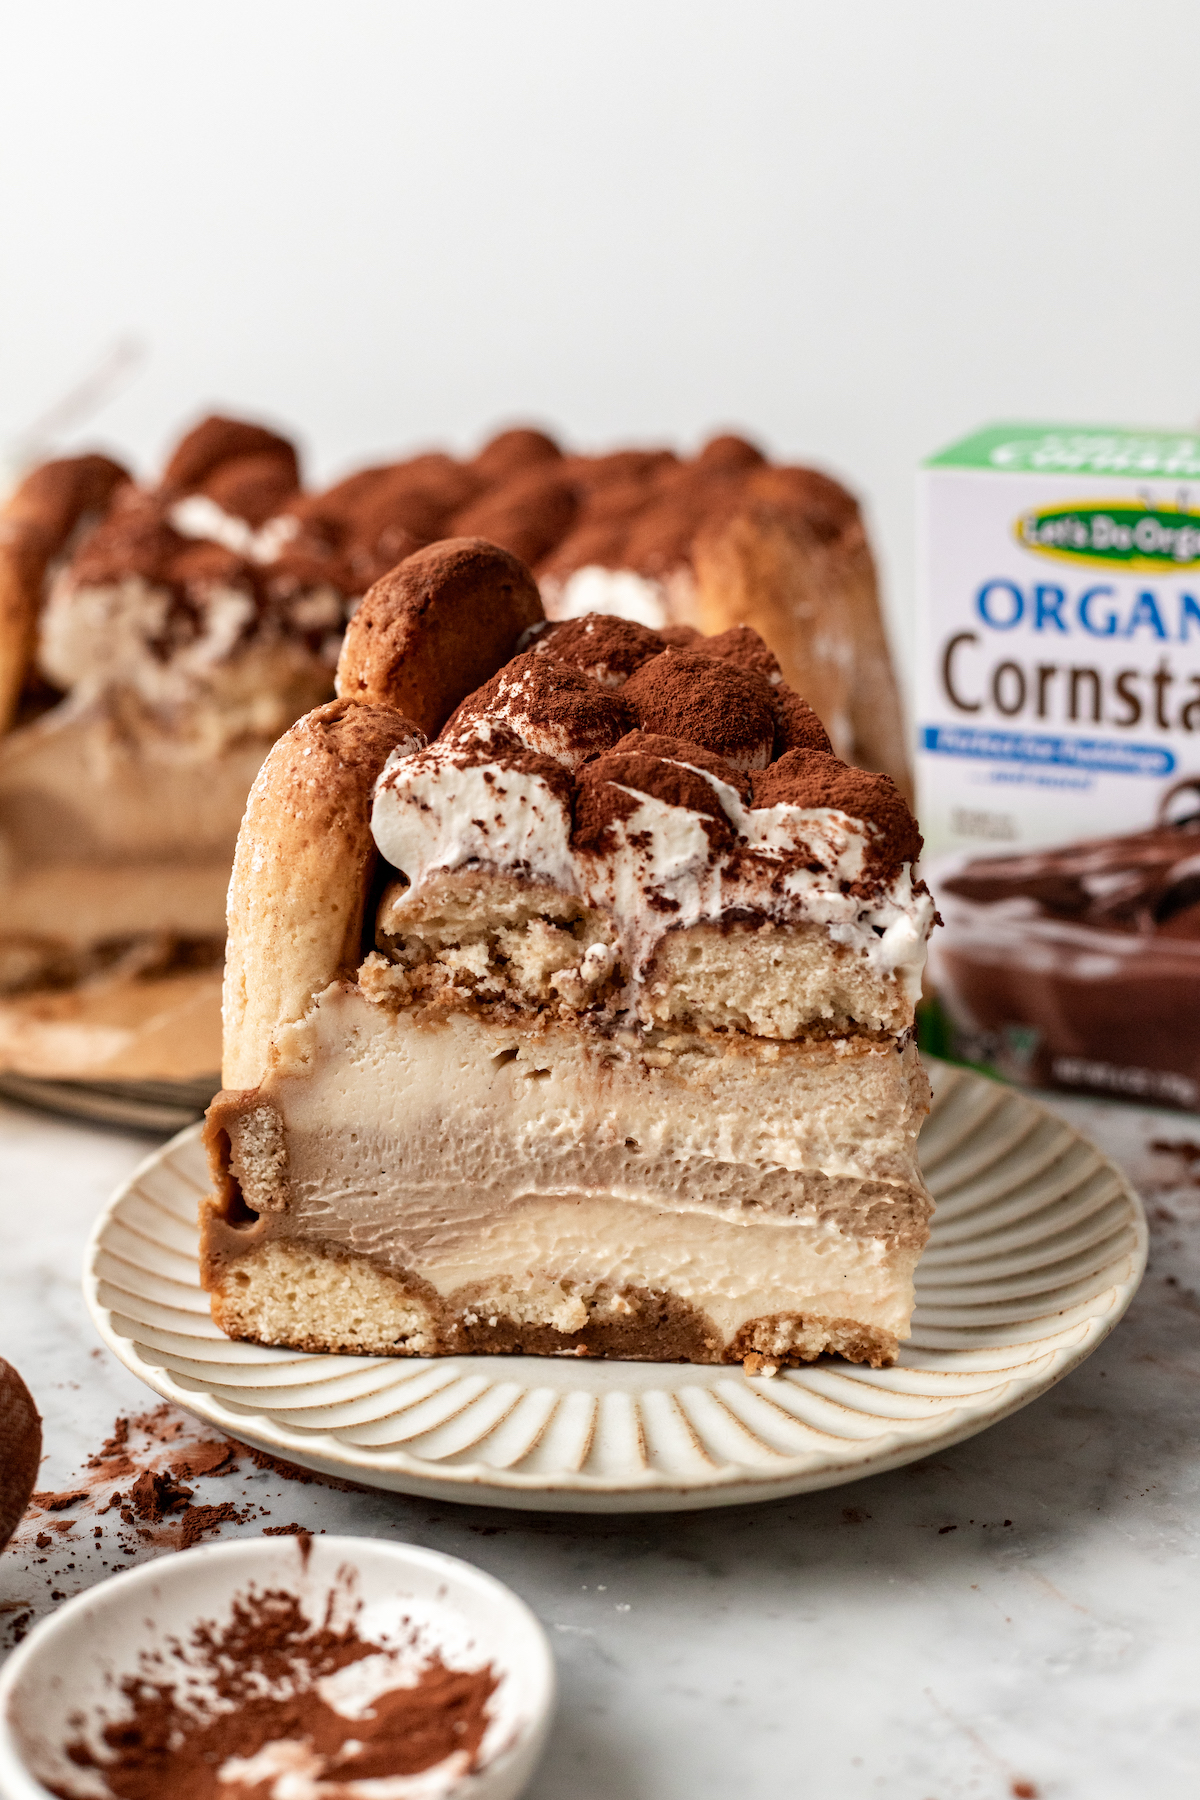 The secret to this dairy free “mascarpone” cheesecake batter is my homemade 3 ingredient vegan mascarpone. The cheesecake batter ends up tasting like the mascarpone cream that fills a tiramisu- with swirls of espresso cheesecake throughout!
Ingredients
- 1 batch vegan mascarpone or sub 1 cup (240 g) dairy free yogurt*
- 2 batches vegan ladyfingers
- 32 ounces vegan cream cheese
- 1 cup (240 mL) Let’s Do Organic Heavy Coconut Cream
- 1 1/4 cups (250 g) granulated sugar
- 8 tbsp (80 g) Let’s Do Organic Cornstarch
- 1 tbsp vanilla extract
- 1 tsp vanilla bean paste
- 1 cup (228 mL) hot water
- 4 tsp instant espresso powder, divided
- 1 cups vegan whipped cream
- 2–3 tbsp cocoa powder
- 2 cups boiling water, for the water bath
Instructions
-
- Prep: We recommend making this tiramisu cheesecake over 2 days. It will be easiest to assemble and make the various components. We recommend making the ladyfingers, followed by the mascarpone, then the cheesecake for day 1. Then chill the cheesecake overnight, and assemble the following day.
- Make the ladyfingers: We recommend making the ladyfingers in 2 batches- not doubling the batch. The reason being is that the batter gets very thick, making it difficult to pipe. It’s super quick to make each batch, so it’s easiest to yield the most amount of ladyfingers!
- Next, make the mascarpone: While the ladyfingers are cooling, you can make the mascarpone according to instructions. Then set aside.
- Prep for the cheesecake: Preheat the oven to 350F. Line a 9″ springform pan with parchment paper, including around the walls. Place a baking sheet onto the bottom rack of the oven. This will be for the water bath.
- Make the cheesecake batter: In a large food processor, cream together the vegan cream cheese, mascarpone, vegan heavy heavy cream, sugar, cornstarch, vanilla extract, and vanilla bean paste until smooth, about 2-3 minutes. Then divide 1/3 of the batter into a separate bowl for the coffee cheesecake batter
- Make the coffee cheesecake batter: Add 2 tsp of instant espresso powder to the cheesecake batter in the small bowl, and whisk until it’s dissolved completely. Then set aside.
- Assemble the ladyfinger crust: Mix the 1 cup of hot water with the remaining espresso powder. Then dip 1 ladyfinger into the espresso mixture, fully soaking it for 5-10 seconds, then place it onto the bottom of the cheesecake pan for the crust (see photos). Repeat until you’ve created the bottom crust. Then line the walls of the cheesecake pan with un-soaked ladyfingers. You should still have some leftover for topping the cheesecake with after baking.
- Pour the batter: Pour half of the vanilla cheesecake batter into the bottom of the pan, followed by the coffee batter, then the remaining vanilla cheesecake batter. Use a butter knife or skewer to swirl the two together, being careful not to over-swirl and ruin your design
- Prepare the water bath: When the cheesecake is ready to bake, pour the boiling water into the baking sheet that’s on the bottom rack of the oven. Then quickly close the door.
- Bake the cheesecake: Place the cheesecake onto a SEPARATE baking sheet (NOT the water bath one), and place the cheesecake onto the middle rack, right above the baking sheet with the water bath (so you have 2 baking sheets in the oven). Quickly close the door, and let the cheesecake bake for 60-65 minutes, or until the top of the cheesecake is lightly golden. If your ladyfingers around the walls are starting to over-brown, cover them with a piece of parchment paper on top of the cheesecake while it’s baking.
- Cool in the oven: After baking, turn off the oven, BUT leave the cheesecake inside. Crack the oven door about 1-2 inches, and let the cheesecake cool in the oven for 1 hour.
- Cool completely: After 1 hour, you can cover your cheesecake, and place it into the fridge to cool completely and set for at least 4 hours, but preferably overnight.
- When ready to serve: The next day, soak the remaining ladyfingers in more homemade instant espresso, and place on top of the baked cheesecake. Then top with vegan whipped cream, and dust with cocoa powder. Carefully remove the walls of the cheesecake pan.
- Slice and serve! Serve immediately after topping, and enjoy! Store any leftovers in an airtight container for up to 5 days in the fridge (without whipped cream).
Notes
Gluten free: Use the gluten-free option for making the vegan ladyfingers- it really works!
Mascarpone: You can just use 1 cup (240 g) dairy free yogurt, and add in 1/2 tsp of baking soda to the cheesecake batter. The baking soda will neutralize the tang slightly, which will make the batter taste more like mascarpone.